Once I realized that any series of loops along the edge of a knot can be extended into a mat, as shown with the "When Knots Collide" pieces, another idea occurred to me, but I had to approach it somewhat elliptically. There had to be a knot that would cover an area without too many, or too large, gaps, to make this piece possible. A friend of mine, a member of the International Guild of Knot Tyers, Patrick Ducey, has made a number of patterns available, some of which were Turk's-heads designed to be laid out flat, and filled in with other, smaller Turk's-heads, and it seemed to me that these filled the bill.
(Click any image to get a closer look.)
|
|

|
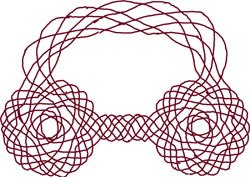
You can get Pat's pattern for the circular mat (it's the 24-bight) from the Knotheads World Wide website library, to see where these two mats came from, but I drew them out without regard to over and under crossings, just to see that the single line path was complete with the connector.
|
|
|
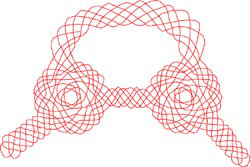
Okay, fine -- it worked with a single connector, now to add a second one. I had to choose (with several missteps) how many loops along the edges it would take to complete a single line throughout the knot. Since the order the passes are in repeats at every sixth loop, I knew that I could "cheat" by making it simple at first, just to verify the knot. Note that there are six loops in the straight connector, and seven in the curved one.
|
|
|
|
I still needed the side-straps, and they "broke" the neckstrap pattern, so I had to change the number of bights (sorry, loops) to restore the single line path throughout.
It's still just a sketch, at this point, no string involved, because I saw no point in using up materials before the virtual knot had some chance of success.
|
|
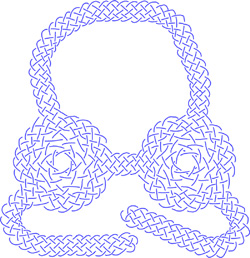
I did a very quick revision of the knot, adding loops along all the edges of the straps where I estimated the needed length to match my model's measurements, laid it out in string, then realized it would be far too wide where the straight connector was; taking some loops out of that changed the values for the others, but it all worked out.
Note that this time I plotted out all the crossings, i.e., over and under weave. In a misguided attempt to save space, I bent the straps around, which just made it hard to work with, but the dimensions were pretty close.
|
|
|
|
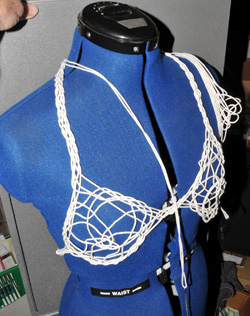
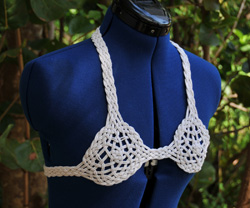
This is just a proof of concept, with a single pass of string going through the knot, laid out on the dressmaker's form. You can see that it is worlds away from being ready to wear...
|
|
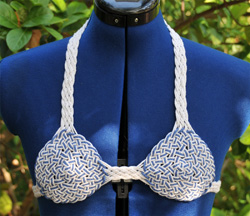
Here it is with a second pass, throughout. Oh, for the information of those who like minor details, this is a little less than a hundred feet of string -- about fifty for each pass. Probably less, once I tightened it up, but that's how much I started out with.
It still has a little too much open space, and probably couldn't be worn in public as-is, but I've got an idea about that, below.
|
|
|
|
Looks like it might work this way, but adding the blue line tightened it up a bit more than I wanted, actually, and shrank the over-all size, so I may do the entire thing again, slightly larger.
Still, I regard this experiment as a success. You'll probably never see one on a beach near you, unfortunately, because nobody could afford to pay me for all the time involved in creating and custom fitting one. I think I've spent several dozen hours on this knot already, let alone the overall project, and I still don't have a good handle on what size I'll end up with.
|
|
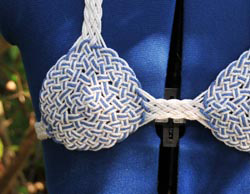
A closer shot of one of the mats, showing how the blue highlighting strand follows the original 24-bight mat that I got from Patrick.
Next phase of the project is to figure out an appropriate knot to form the complementary part of the ensemble.
|
|
|

|
A behind-the-scenes shot, creating the knot from the drawing. I numbered the loops 'round the edges, to prevent errors... or, at least make it easier to fix them, it turns out. Note that there is a misweave (inset) which came about on loop number 108, and that I discovered it while adding loop number 168. There are 190 loops in total.
|
|
|